Welcome to the JobyDesk guide on setting up your Price Book.
Your Price Book is the engine that drives your estimates and invoices. It acts as your master catalog for all your services, parts, and labor rates. Taking the time to properly configure your Price Book ensures your team charges consistent prices and saves your dispatchers from manually typing out line items for every job.
Here is how to build and organize your master catalog from scratch.
Accessing Your Price Book
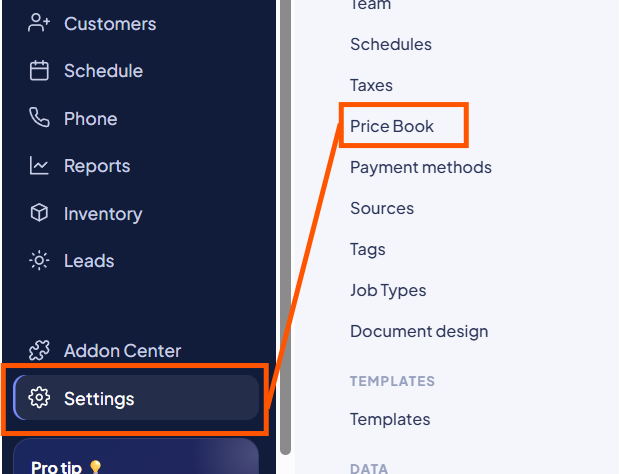
To get started, you will need to navigate to the Price Book settings.
- Head to the bottom left of your sidebar and click on Settings.
- From the inner menu under System Settings, select Price Book.
Step 1: Creating Categories
Before adding individual charges, it is best to set up Categories. Categories act as buckets (like “Labor,” “Parts,” or “Automotive Services”) that make your items easy to scan and search for when building an invoice.
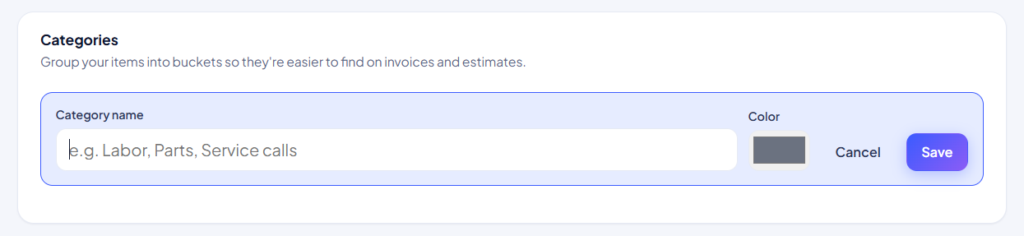
- Click on the Categories tab within the Price Book menu.
- Click the black + Add category button.
- Enter a Category name and choose a color tag to help identify it.
- Click Save.
Step 2: Adding Individual Items
Once your categories are established, you can start building your individual charges.
- Switch over to the Items tab.
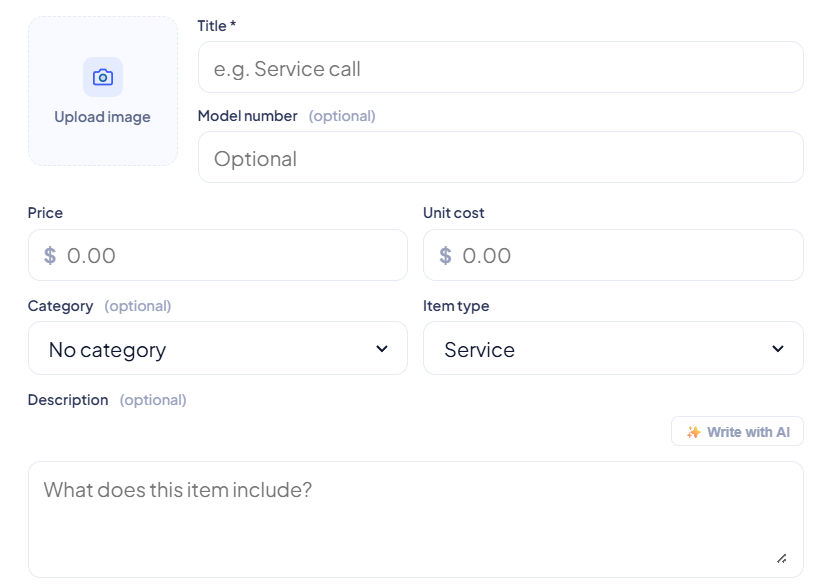
- Click the + Add item button to open the creation menu.
- Fill out the core details for your new charge:
- Title: Name the item (e.g., Standard Dispatch Fee).
- Image: You have the option to upload a custom image for the item.
- Price & Unit Cost: Enter what you charge the customer, along with your internal base cost.
- Category & Item Type: Assign it to one of your newly created categories and specify if it is a Service, Part, or Labor.
- Description: Provide a brief explanation of what the item includes.
- Set your rules: Toggle whether the item is a Taxable item and ensure the Active toggle is turned on so it appears in your picker.
- Click Add item to save.
Step 3: Building Groups (Bundles)
If you frequently sell multiple items together, you can bundle them into Groups. This allows your technicians to add a complete package to an invoice with a single click, rather than searching for each piece individually.
Note: You must have more than one active item in your Price Book to create a group.
- Switch to the Groups tab.
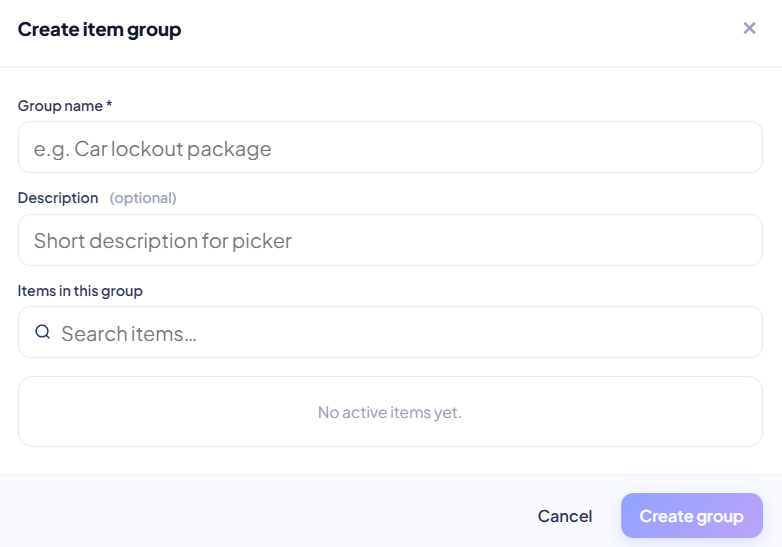
- Click the + Create group button.
- Enter a Group name (e.g., Car Lockout Package).
- In the Items in this group section, select the individual services and labor charges from your list to combine them.
- Click Create group to save your new bundle.
Your Price Book is now ready to use! Any active items or groups you created will immediately be available to pull into your estimates, work orders, and invoices.
Related Links: