In this article, you will learn how to set up your company information, branding, and operational parameters to completely personalize your workspace.
Configuring your company profile is essential for powering your daily business operations. By establishing accurate business details, service areas, and operational hours, you ensure that your scheduling, billing, and public-facing communications always remain professional and aligned with your brand.
Configuring your company settings
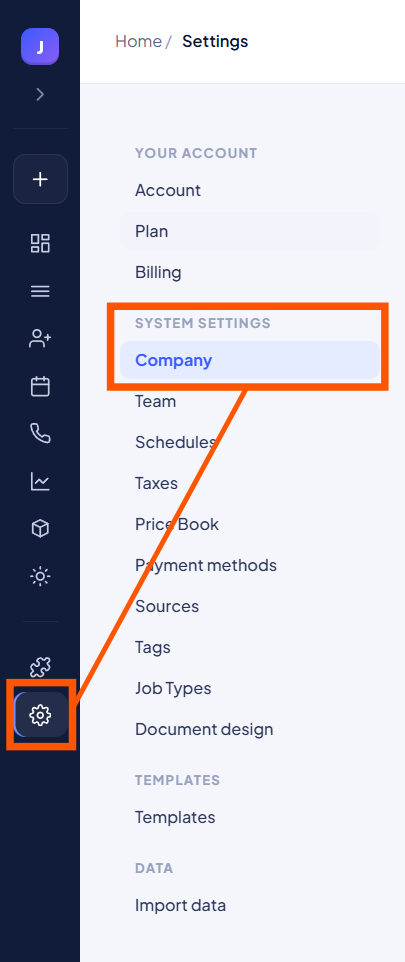
In order to set up your profile, you will need to access your system settings.
1. Navigate to Settings:
From the bottom of the left sidebar, click Settings.
2. Access Company Settings:
Under the System Settings menu, select Company.
3. Set your Brand details:
Click the Upload logo button to add your company emblem, select a primary brand color, and type in an optional tagline for your document footers.
4. Fill out your Business info:
Accurately input your official Business name and legal entity name, and select your industry and business type from the dropdown menus. Be sure to add your company email, phone number, website, tax identifiers (like your EIN), and team size.
5. Enter your Address and Time zone:
Scroll down to the Address section. Start typing in the Street address field to allow Google to automatically autofill the rest, or enter the details manually. Then, use the Time zone dropdown to specify your exact local time to ensure accurate scheduling and reminders.
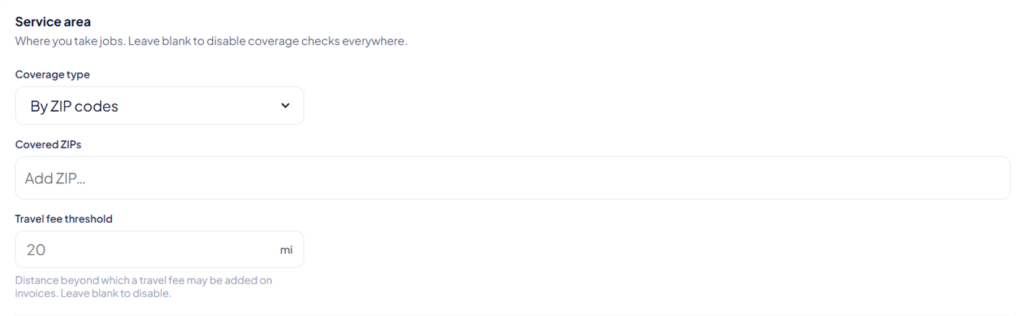
6. Define your Service area:
Select your Coverage type from the dropdown (options include By ZIP codes, By radius from address, or By cities / counties) and input your location parameters. You can optionally set a Travel fee threshold in miles to calculate distant calls.
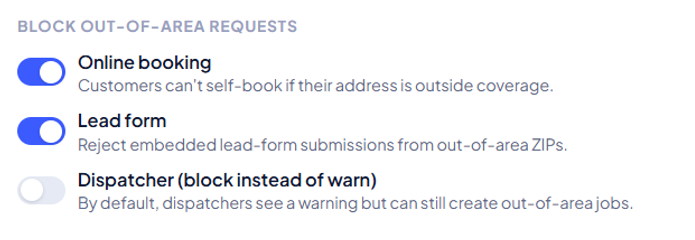
7. Manage Out-of-Area Requests:
Use the toggle switches under the BLOCK OUT-OF-AREA REQUESTS section to automatically allow or block out-of-area Online booking, Lead form submissions, or Dispatcher overrides.
8. Establish your Hours of operation:
Use the time dropdown menus to adjust the open and close times for each day of the week, and use the toggle switches on the far right to mark specific days as open or closed. If you offer round-the-clock assistance, flip on the Offer 24/7 emergency service toggle.
9. Save your profile:
Once your settings are fully configured, click the black Save changes button at the bottom of the screen.
Your company profile is now complete and ready to fully support and streamline your business operations.