In this article, you will learn how to build a custom call flow route from scratch using the VIP Phone System drag-and-drop IVR builder.
The drag-and-drop IVR builder ensures every single customer call is intelligently routed based on your company’s business hours and team availability. Setting up tailored call flows helps maximize team efficiency and guarantees that customer calls are always answered or routed to voicemail rather than getting dropped or misdirected.
Building a Custom Call Flow
In order to build a custom call flow, you will need to access your JobyDesk Add-on Center.
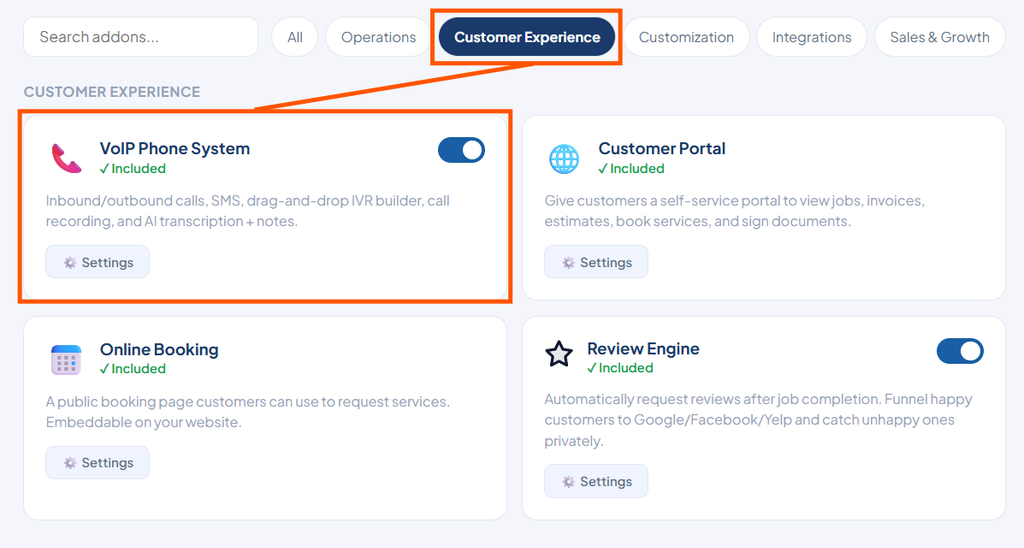
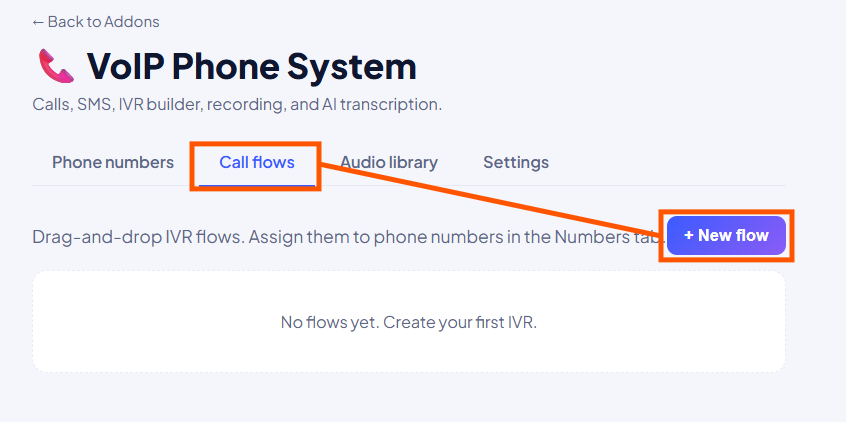
1. Navigate to Call Flows: Go to the Add-on Center on the left sidebar. Under the Customer Experience category, find the VoIP Phone System card and click Settings. Select the Call Flows tab and click New Flow.
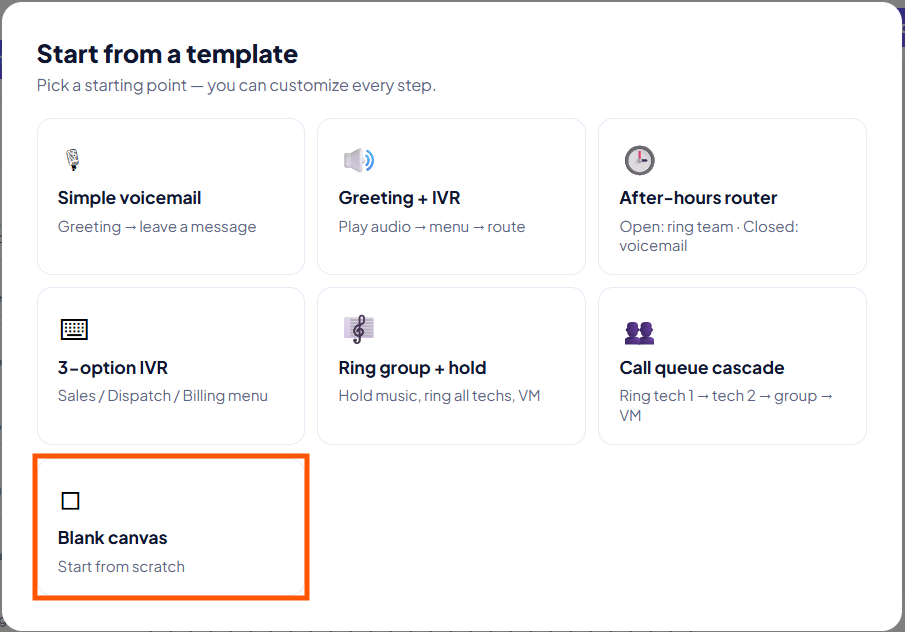
2. Select Canvas Type:
Choose from templates or choose Blank Canvas to build a custom call route completely from scratch.
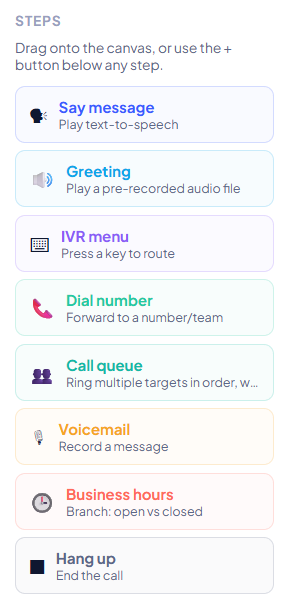
3. Overview of the Routing Toolkit: Before adding steps, review the available tools in the left steps panel:
- Say Message: Uses instant text-to-speech.
- Greeting: Plays pre-recorded audio files.
- IVR Menu: Lets callers press a key to route the call.
- Dial Number: Forwards directly to a specific phone.
- Call Queue: Rings multiple targets in order.
- Voicemail: Records a message.
- Business Hours: Branches the flow based on whether the business is open or closed.
- Hang Up: Cleanly terminates the line.
Constructing Your Custom Route
Because every business is unique, you can combine the tools above in any order to create the exact caller experience you need.
1. Drag and Drop Steps:
Drag modules from the left panel onto the canvas to begin building. For example, many businesses choose to start by dragging a Greeting step to the top of the canvas, but you can start with whatever makes sense for your operations.
2. Configure Step Settings:
Click any step on your canvas to open its configuration panel on the right. This is where you will select specific audio files, type text-to-speech messages, or assign specific team members to ring.
3. Insert Logic Branches:
You can create branching paths by dragging in a Business Hours or IVR Menu step (or clicking the small + icon on a connecting line). For instance, a Business Hours step automatically splits the flow into an Open route (green) and a Closed route (red), allowing you to handle after-hours callers differently.
4. Connect the Flow:
Ensure every route leads to a final destination. If you use a Call Queue to ring your team on the open route, be sure to connect a Voicemail step to the Failover Route at the bottom to capture any missed calls.
5. Save and Activate:
Once your custom route is fully connected and configured to your liking, enter a custom name in the top bar and click the blue Create Flow button.
Note
When routing calls to an external number (like a technician’s personal cell phone), JobyDesk automatically enforces a “press 1 to accept” requirement. This prevents personal cell phone voicemails from answering and hijacking business calls. Checking the Send Straight Through box bypasses this prompt and shows the customer’s real caller ID, but leaving it unchecked ensures personal carrier voicemails do not prevent calls from reaching your failover route.
Once created, your new call flow will be active and ready to handle incoming caller traffic automatically.