In this article, you will learn how to create and track purchase orders within your inventory system.
Managing stock levels is crucial for maintaining efficient field operations. JobyDesk automatically alerts you when essential parts are running low, helping your business prevent stockouts and stay ahead of demand. By utilizing purchase orders, you can seamlessly restock items from your dashboard, maintain accurate records with your suppliers, and ensure your inventory levels are always up to date.
Generating a new purchase order
In order to create a purchase order, you will need to access your inventory dashboard.
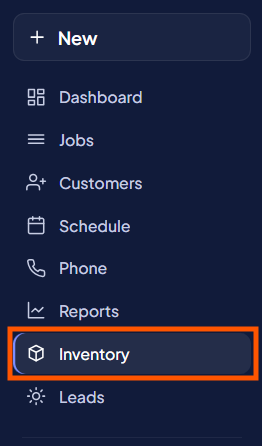
1. Navigate to Inventory:
Go to the left sidebar and click Inventory.
2. Select items to restock:
Go under the Purchase Orders tab to find a dedicated list of items that have fallen below your custom minimum levels. Check the box next to the items you need to reorder.
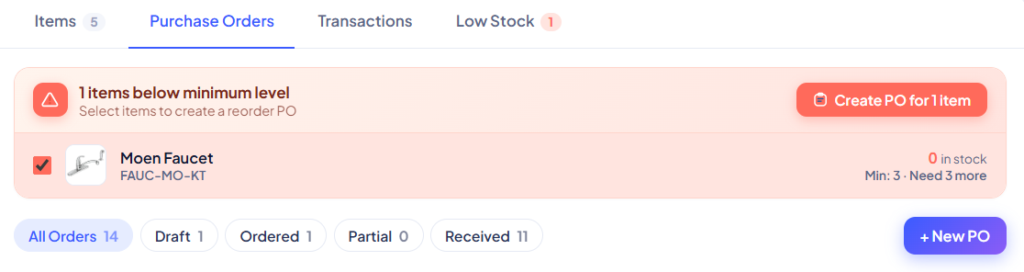
If everything looks adequately stocked, simply click the New PO button to manually choose the items you need.

3. Generate the order:
Click Create PO to instantly open a new purchase order window. Your selected items and restock quantities will be automatically filled out for you.
4. Fill out order details:
Provide the required information for the vendor and fulfillment:
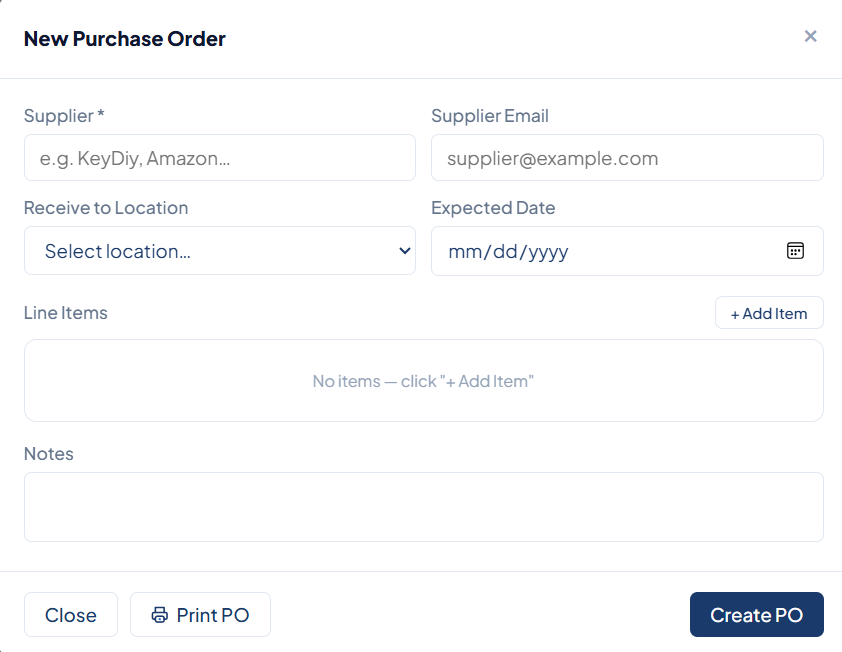
- Enter your supplier’s name and email.
- Select the receiving warehouse.
- Set an expected date.
5. Finalize the draft:
Review the total, add any vendor notes, and click Create PO. Your order is now successfully saved as a draft.
Note
Once an order is generated, you can click on it and select Print PO if you need a physical copy or a PDF to email to your vendor. You can also use the status dropdown to manually track where the order is in your pipeline, changing the status from draft to ordered or sent.
Receiving inventory and closing orders
When your shipments arrive, you can log them into the system to automatically update your stock.
1. Initiate receiving:
Click the purple Receive button next to the relevant order.
2. Handle partial shipments (if applicable):
If your supplier only sent a partial batch of the requested items, adjust the receiving quantity to match what arrived and click Confirm Receipt. The purchase order status will automatically update to Partial.
3. Log the final batch:
Once the remaining parts arrive, click Receive again. Confirm the final batch.
The system will automatically track how many items are still expected, update your inventory levels, and change the PO status to Received, fully closing out the order.