In this article, you will learn how to build your parts catalog and manage your inventory stock levels.
Keeping your inventory organized is key to running an efficient field service business. By setting up structured item folders, tracking item details, and maintaining proper quantities, you ensure your technicians always know what is available for their next job.
Building a new item and managing stock
In order to manage your inventory, you will need to access your inventory dashboard.
1. Create an inventory category:
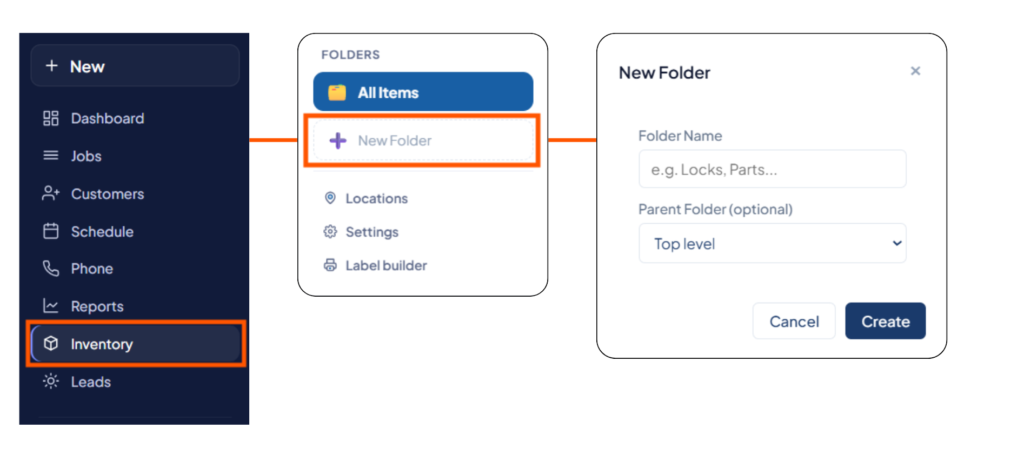
Go to the left sidebar and press Inventory. Under the folders section, click + New Folder, type in a name like valves, and hit Create.
2. Open the new item window:
With the folder ready, click the blue + New Item button located in the top right corner.

3. Fill in item details:
Input all the necessary data to track your new part:
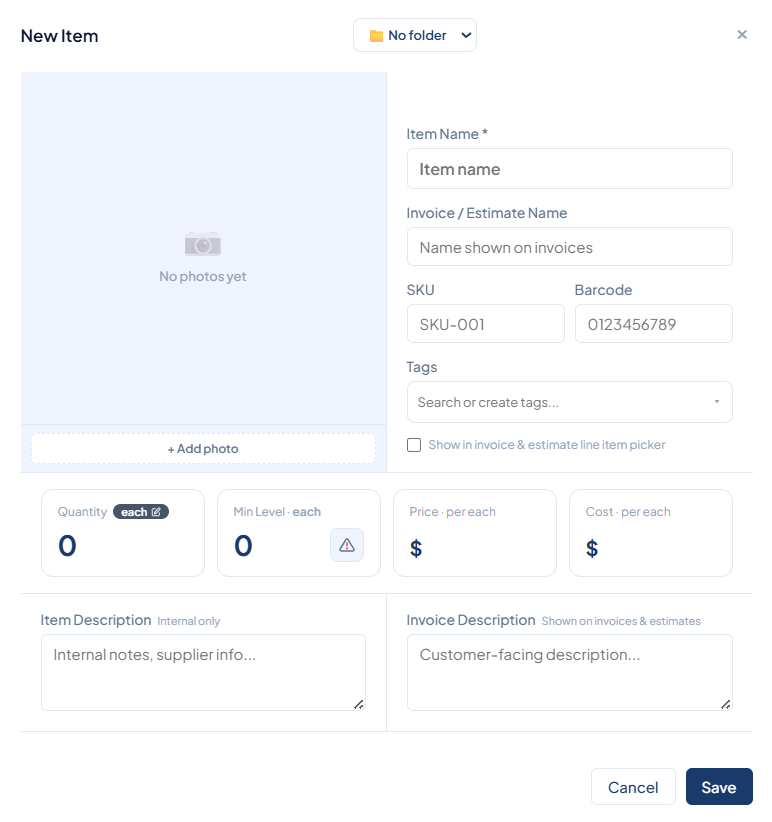
- Use the dropdown at the top to assign the part to your created folder (e.g., valves).
- Click + Add Photo on the left side of the window to upload a clear picture of the item.
- Enter an internal item name and an invoice name that your customers will see.
- Add tracking identifiers like a SKU and barcode.
- Set a minimum level to trigger low stock alerts.
- Input your selling price and unit cost, and add any helpful descriptions.
4. Save the item:
Click Save to complete the initial item creation.
5. Update stock levels:
When a shipment arrives, click on the item to open it, then click the +/- icon next to quantity. Enter the new stock amount, optionally add a transaction note, and click Update and then Save.
Notes
Creating an item with zero quantity on hand will trigger a red “low on stock” warning banner at the top of your dashboard, and the item card will be marked as out of stock. Once you update the stock levels, the warning clears automatically, and your metric cards will recalculate your total quantity, total retail value, and total cost.